Quick Start Guide
This guide gives you a high-level overview of the steps required to get PMP4PG up and running — from installation to monitoring your first PostgreSQL server.
For detailed instructions on each step, follow the links to the dedicated sections.
Overview
Setting up PMP4PG involves four main phases:
Phase 1 — Set up the repository
         ↓
Phase 2 — Deploy the backend
         ↓
Phase 3 — Deploy an agent on a PostgreSQL server
         ↓
Phase 4 — Connect and start monitoring
Phase 1 — Set up the Repository
The PMP repository is a PostgreSQL database that stores all metrics collected by the agents.
- Install PostgreSQL 16+ and TimescaleDB on your repository host
- Run the provided SQL scripts to create the database, user and schema
# Step 1 — Create the pmp4pg user, the metadata database and the pmp schema
# (connect as the postgres superuser)
psql -U postgres -h localhost -f 01-create-user-and-database.sql

# Step 2 — Create all tables and indexes in the pmp schema
# (connect as the pmp4pg user, on the metadata database)
psql -U pmp4pg -h localhost -d metadata -f 02-create-tables.sql
📖 Full details → Repository Setup
Phase 2 — Deploy the Backend
- Install the server RPM package on your backend host
- Edit
application.propertieswith your repository connection details - Enable and start the
pmp4pgservice
# Install the server RPM
rpm -ivh pmp4pg-1.0.0-1.x86_64.rpm

# Edit the database connection settings
vi /etc/pmp4pg/application.properties
# ── Database ─────────────────────────────────────────────────────────
# JDBC URL of the PMP4PG repository database
# Format: jdbc:postgresql://<host>:<port>/<database>
db.url=jdbc:postgresql://localhost:5432/metadata

# PostgreSQL user dedicated to PMP4PG
db.username=pmp4pg

# PostgreSQL user password
db.password=your_secure_password
# Enable and start the service
systemctl enable --now pmp4pg

# Verify the service is running
systemctl status pmp4pg
● pmp4pg.service - PMP4PG — PostgreSQL Workload Analyzer
     Loaded: loaded (/usr/lib/systemd/system/pmp4pg.service; enabled; preset: disabled)
     Active: active (running) since Fri 2026-06-26 23:02:48 CEST; 1min 8s ago
       Docs: https://www.pmp4pg.com
   Main PID: 718 (java)
      Tasks: 38 (limit: 12115)
     Memory: 340.6M
        CPU: 18.521s
     CGroup: /system.slice/pmp4pg.service
             └─718 /usr/bin/java -Xms256m -Xmx512m -jar /usr/share/pmp4pg/pmp4pg.jar --spring.config.location=/etc/pmp4pg/application.properties
The server RPM installs the backend and the embedded frontend together — there is no separate frontend deployment step. By default, PMP4PG ships without SSL; the platform is accessed over plain HTTP on port 8080. See Backend Installation for enabling HTTPS with a reverse proxy.
📖 Full details → Backend Installation
Phase 3 — Deploy an Agent
Repeat this phase for each PostgreSQL server you want to monitor.
- Create the monitoring user on the PostgreSQL instance to monitor
- Install the agent package (RPM or DEB depending on your OS)
- Edit
/etc/pmp4pg/agent.confwith the PostgreSQL connection, backend URL and registration token - Enable and start the
pmp4pg-agentservice
# Step 1 — Create the monitoring user (run on the monitored PostgreSQL instance)
psql -U postgres -h localhost -f create_monitoring_user.sql

# Step 2 — Install the agent package
# Red Hat family (Rocky Linux, RHEL, AlmaLinux)
rpm -ivh pmp4pg-agent-1.0.0-1.x86_64.rpm

# Debian family (Debian, Ubuntu)
dpkg -i pmp4pg-agent_1.0.0-1_amd64.deb

# Step 3 — Edit the agent configuration
vi /etc/pmp4pg/agent.conf
In agent.conf, set the PostgreSQL connection details, the backend URL (HTTP, port 8080 by default) and the registration_token provided by the platform administrator. See Agent Configuration → for the full reference.
# Step 4 — Enable and start the agent service
systemctl enable --now pmp4pg-agent

# Verify the service is running
systemctl status pmp4pg-agent
○ pmp4pg-agent.service - PMP4PG Agent - PostgreSQL Performance Monitoring Agent
     Loaded: loaded (/usr/lib/systemd/system/pmp4pg-agent.service; disabled; preset: disabled)
     Active: inactive (dead)
       Docs: https://data-resilience.fr/pmp4pg
On first start with a valid registration_token, the agent automatically registers itself with the backend — no manual registration command is required.
📖 Full details → Enroll a New Server
Phase 4 — Connect and Start Monitoring
-
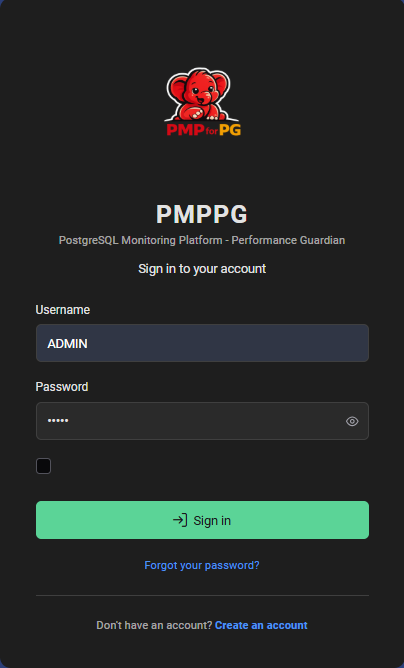
Open your browser and navigate to your PMP4PG backend server:
http://<your-backend-server-ip-or-hostname>:8080/pmpnotePMP4PG ships without SSL by default — the platform is accessed over HTTP on port 8080. See Backend Installation for configuring HTTPS via a reverse proxy.
-
Log in with the default administrator credentials:
Field Value Username ADMINPassword adminChange the default passwordChange the default
adminpassword immediately after your first login before exposing the platform to any network. -
The newly registered server will appear in the Global Dashboard
-
Click on the server to access Server Detail, ASH Viewer, AWR Viewer and Trends
📖 Full details → Accessing the Platform
Estimated Setup Time
| Task | Estimated Time |
|---|---|
| Repository setup | ~15 minutes |
| Backend deployment | ~10 minutes |
| First agent deployment | ~10 minutes |
| Total (first install) | ~35 minutes |
Additional agent deployments take approximately 5–10 minutes each once you have a working agent.conf template.
Next Steps
Ready to go deeper? Follow the full installation guide: